
AdhesiveCardsCouture FlowersDecorative DiesDesign Team 2015GemstonesGlitter GlueJulianne McKenna-De LumenSecret GardenVintage Rose Garden
Secret Garden Cards by Julianne McKenna-De Lumen
#couturecreationsaus
Welcome everyone!
Today, I'm going to share two quick and simple cards with you, both created using the Secret Garden Intricutz Dies.

Start with a vanilla or cream cardstock base, cut to 6"x 8". Fold in half to create a 6"x 4" card. Choose two patterned papers, cut one to 5.75"x 3.75", and cut the second to 5.5"x 3.5". Ink the edges of both sheets of paper with gold ink.

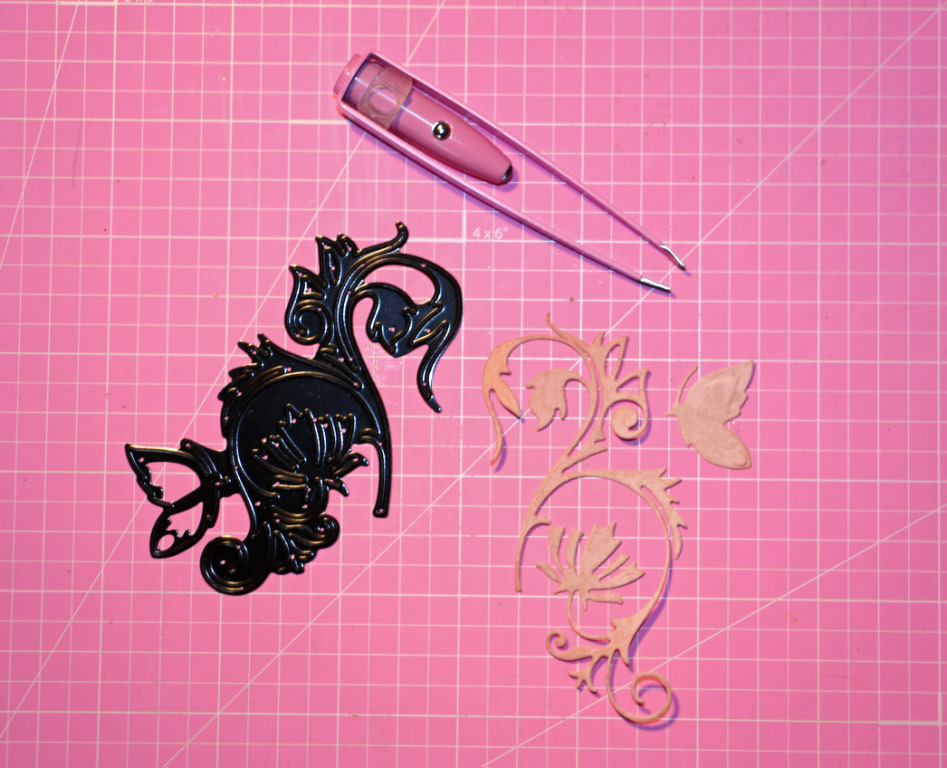
Choose another sheet of paper, and cut out the Butterfly Flourish 2 die.
Choose a plain white paper flower, and a chipboard sentiment (mine is from Imaginarium Designs) to place on the card.

Colour the flower with a pale pink spray. Dry with a heat gun. Using a darker pink, paint the outer edges of the petals. Dry thoroughly with a heat gun.

Colour the chipboard sentiment with Inka-Gold (Old-Gold). If you do not have Inka-Gold, you could use any paint, ink, or embossing powder.

Now, stick it all together. Adhere the larger piece of paper to the cardstock, and then the smaller piece on top. Glue the flower into the bottom left hand corner. Adhere the Butterfly Flourish die cut slightly above, and to the right of the flower. Adhere the butterfly in position with 3D foam squares. Finally, glue the chipboard sentiment into the top right hand corner of the card.

Finish with a coat of Glitzin' Glamour on the butterfly (I've mixed crystalina and pink), and adhesive gemstones in the bottom right, and top left hand corners.
...............................................................................................................
The second card is just as easy.
Start with a piece of cardstock for your card base, and two sheets of paper to layer on top. Use the same dimensions as listed above.

You will need three small white flowers, a chipboard corner, and a chipboard sentiment (Imaginarium Designs). Using the same products as listed above, colour the flowers with a pale pink spray, and dry thoroughly with a heat gun. Coat the chipboard pieces with Inka-Gold.

Choose another sheet of paper, and cut out the Riding Cart and Pointy Fence dies.

Using a black pen and ruler (or sewing machine if you prefer), draw a stitched border around the two sheets of paper that will be used as the background, on the cardstock base. Adhere the larger sheet of paper to the cardstock, and then adhere the smaller sheet on top.

Take the die cut fence, and cut the last three posts off (from the right end). Glue to the bottom left hand side of the card front. Using 3D foam squares, adhere the die cut Riding Card to the card, on the right hand side.

Now add the final touches. Adhere the corner to the top left corner of the card, and the chipboard sentiment slightly below. Glue the three small flowers onto the card, as shown.


1 comments